10pm Saturday night. I try to publish a post every Friday morning for the Fine Leatherworking blog. On most Thursday nights I am doing final edits and then queuing the post for our newsletter and our blog. Two days later, I have long since blown that deadline. I will eventually end up posting a week later but the results will be worth it. In my previous post, I wrote about unsticking yourself on project, for me that project is making shoes. What I advise on our blog is born out of what I do for myself and to get unstuck with my own situation that meant making a pair of sandals. Making a pair of sandals was meant to be a learning project so that I could work up to shoes and definitely learned a lot in making just one pair. Like many of my readers, making leatherworking can be a deeply engrossing endeavor and crafting sandals had been no exception. In today’s post, I’m going to show you how I built these sandals but first here’s the result.
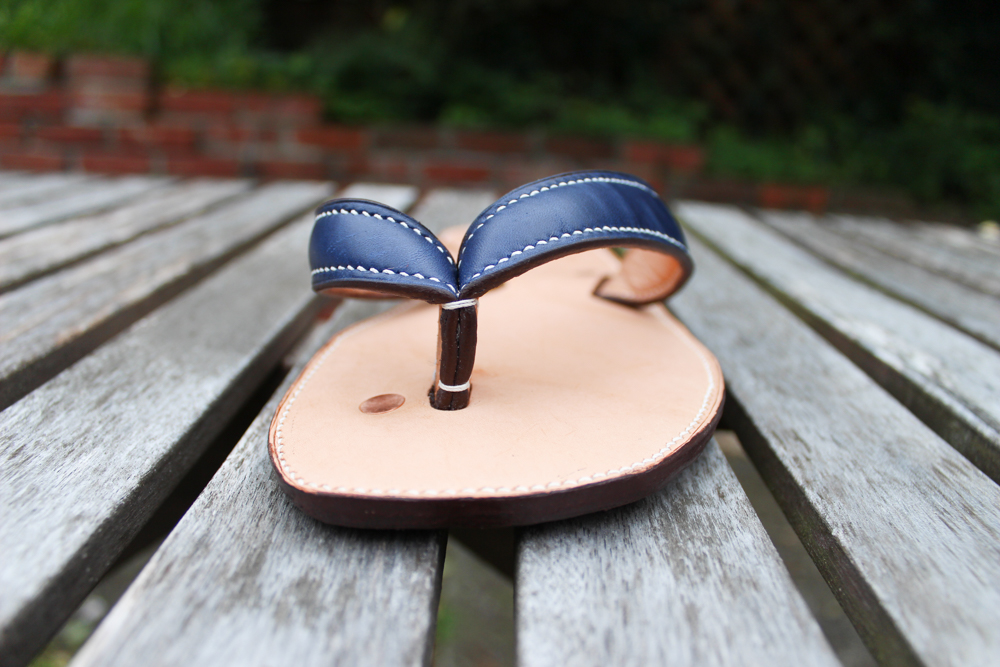
Hand-sewn Sandals


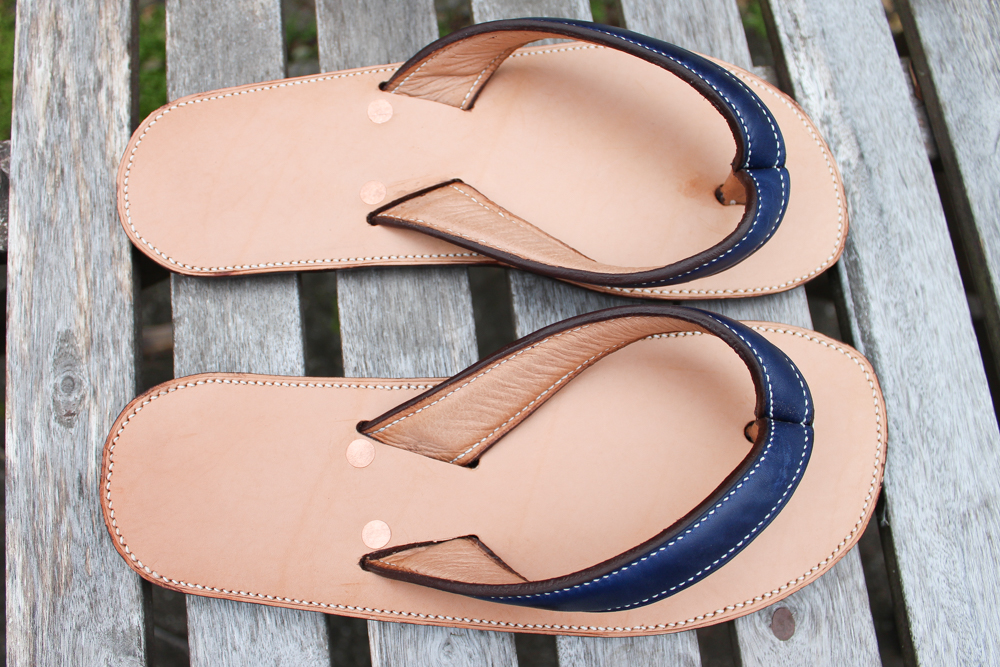
These are hand-sewn flip flops built with veg tan insoles and strap backs. Anywhere leather touches skin usually calls for vegetable tan leather because it is stiffer and better withstands the oils from your feet. Chrome tanned leathers, which are usually more flexible and have more interesting finishes on top, are common for shoe ‘uppers’ or the outside of a shoe. In this case the strap tops are blue chrome tanned leather. I also made the lower soles out of some extra chrome tan leather I had lying around.


Ideas and decision-making
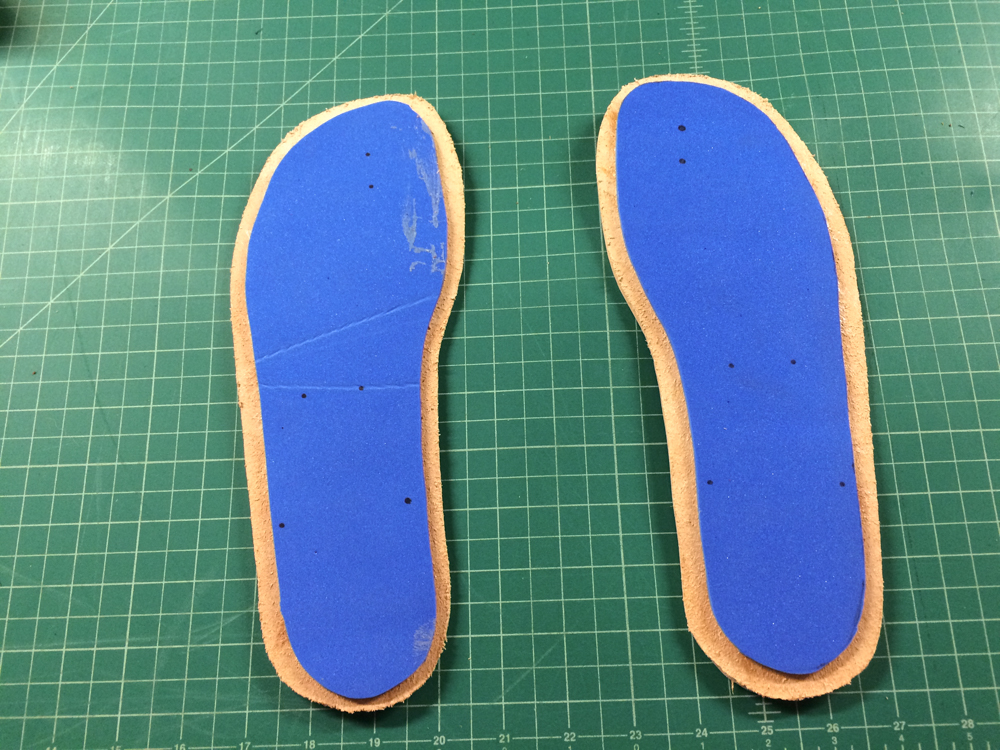
Inside the sandal is a foam mid-sole which you’ll see later. Glue and flattop copper rivets secure the straps. Hand sewing these sandals allowed me to do a hidden stitch that is usually reserved for bespoke shoes. We’ll look at the details of this stitch later on.
I decided to first make a practice pair of sandals. This meant that I didn’t need to be precious about how to design and construct the shoe. I sometimes feel stifled because I find it challenging to select which design or construction method to use. By purposefully completing a few practice pairs of sandals, I can try several methods then see what works.
Since I have a background in leather goods making, I crafted these first sandals like a luxury handbag. I reinforced the stress points with rivets and used two layers of leather so that there was a face side (the top of a hide) on all sides of the sandal. I also finished the edges of the sandal with the painting and heat creasing process usually done for purses. Mid-soles are often skipped in flip-flops, but I wanted the extra cushioning so I added that to my build.
However, there were a few things that I purposely left out of my process. Most of the leather was used at its original thickness, which minimized the amount of skiving required. I also didn’t use a shoe last. Many sandals are made without lasts and I wanted to see if I could do without one. I was making this pair for me and I could size the straps to my own feet. Lastly, I left off the heel. I have a pair of rubber heels ready to go, but wanted to see how these sandals turned out before applying them.
The Build
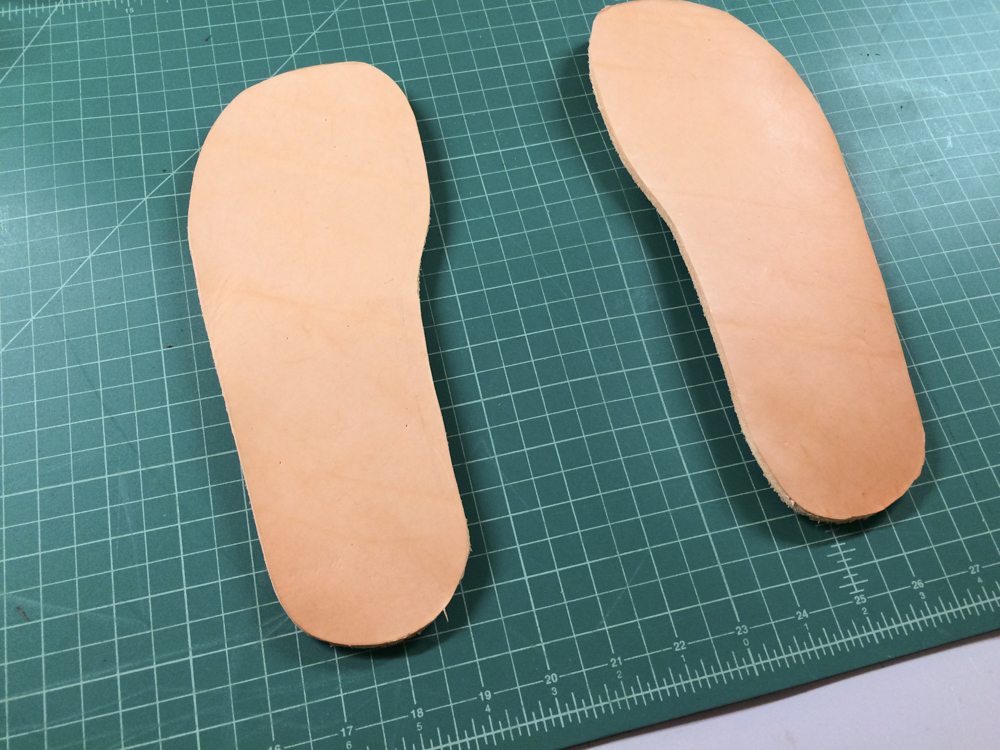
I first cut the insoles, since they are the final shape of the sandal. As I mentioned earlier, I created extra padding by cutting my mid-sole from foam padding typically found in shoes. In order to make sure that the foam didn’t show, I cut the mid-sole inset from the insole and later glued the outers over them.


I next cut my straps, leaving the insides long so I could trim them back to their final length. I would later do this to the outer soles as well. The straps are cut as one piece, like an ‘X,’ so that when they are folded, a smooth surface faces in between the toes instead of a cut edge. You can see in the above pictures where the leather meets up in the center. I got this tip from Tim Skyrme’s book on sandal making; it’s a great resource if you’re thinking of trying this out on your own. There is a foam insert inside the straps, which makes them more comfortable and allows them to fit tighter without hurting.


The straps then went into my stitching clam for sewing and then I creased and finished the edges until they were smooth.


After I sealed the edges, I sewed shut the ‘X’ to form the strap. You can see that it’s reinforced where the leather splits off. The other side of the strap is the middle of the ‘X,’ and this is where it will sit between the toes. I then did a quick test fit on the insoles to place the front hole.


I doubled check my front placement and then punched through my hole. I also marked my stitch marks for sewing the outers. Having both a long and a short pricking iron allowed me to go around the curves of the sole.


With the front hole punched, I could more accurately place the back holes where the straps insert around the foot. I punched those sections out and now all straps were ready to be secured to the upper sole.


To secure the straps, I glued them in and also reinforced them with copper rivets. I chose copper rivets because they are flat on top and you can cut them to an exact height. I didn’t want the rivets to poke into my feet or through the outer sole so getting the height right was key. I also tried to place the rivets where there wasn’t going to be heavy contact. The front rivet slips in between the joint of the big toe and the pad. This section of the toe doesn’t make as much contact with the sandal. I’m sure I looked strange to my family as I was intently staring at the contours of my feet bottoms.


Next up was gluing the outer sole to the mid and inner sole. Since it all gets sewn up, the entire upper portion of the sandal needed to be completed before I glued on the outer sole. I had previously cut the outers wider so that I could trim back the excess to get a straight edge for the final dimensions.


In other stitched shoes, I’ve seen the seam wear out along the perimeter where the insole is attached to the outer sole. To combat this, bespoke shoemakers will do a hidden stitch in the sole so that the wear from walking on shoe won’t abrade the thread. To cut the sewing channel, I set my blade to go about half way down into the outers and then cut a line where the stitch will exit from the top. I then spread out the cut with a tool called a bone folder.


You can see in the photo above why this is called a hidden stich. When you pull on the stitches, the leather closes itself up in most places making the back of the stitch even easier to hide.


To further reinforce the bottoms, I then put a little bit of glue in the channel and hammered it shut.


Once the sandal was mostly done, I was ready to finish the outer edges. I shaped, painted, creased“>creased, and then smoothed the edges out further with a heating palette.


Deciding
The hardest part of this build for me was deciding what to do. I probably spent as much time sewing together these sandals as I did deciding how to design and build them. For example, I fussed over the hole placement for the straps for a long while, probably three to four times as long as it took to actually punch the holes. I also wasn’t sure about the correct strap tension around my foot, the placement of the rivets, or even whether to do rivets at all. I learned a lot from building these sandals out and that was the point. Before I started, I had done a lot of reading and researching about sandal making and shoemaking in general. As I have learned from my previous crafting experiences, it’s hard to predict the questions that will arise until I start building. I try to mitigate this by asking experts for help and researching as much as possible so that I avoid the common pitfalls. That’s only part of the challenge though as it is possible to get perfectly thorough sandal making instructions and still not be able to make them. To make the most of what you learn, try it out but don’t have to agonize over what to do. Make one or more deliberate practice pieces to experiment with techniques. I’m going to start using these sandals and in our next post, I’ll tell you about what worked and didn’t work.


ottimo lavoro, bravo
Thanks so much, Paolo!
Amazing what a great idea! where did you get the blue foam from I’d be really interested in getting hold of some and trying it in my bag straps
Thank you for your help and great tutorial
Hi Nu. Thanks for taking a look at the post. Feel free to send us an email and we can give you more information. Thanks again!
Thank you for this inspiration. I made and sold custom sandals a couple of decades ago and one issue always plagued me– the bottom soles were too slippery on most surfaces. Tried using Vibram and other rubber materials but stitches often pulled through after awhile. Might give it another go.
Would love to hear how it goes, Tony! Keep us in the loop.
I’d be afraid of the smell that would acquire within the leather over time. I also see that the guys over at Kendal and Hyde are starting to get into the leather sandal business.
Interesting note, Chris. I’ll have to check out the sandals that Kendal and Hyde are making. Thanks for the tip!
Mighty classy looking sandals and excellent instructions with well documented steps. I love the hidden stitch details
Only, I’m a little lost on why such wonderful effort on classy flip-flops?
I assume you built these for wearing around hotel rooms?
I confess to not being a fan of flip flops; with my level of clumsiness, even slightly loose sole tips cause me to stumble around like a goose with injured feet. Restricting my use for flip-flops to taking showers in public accessible shower stalls. Hardly a task for such fine leather goods.
I agree with the oddity of gazing at one’s foot soles. What materials and methods are best for constructing comfortable and supportive soles? What will fit where? Where should the stiches go?
I look forward to your discovery process and the wonderful education you provide us!
Thank you!
Thanks for your awesome feedback! The project is a bit of an oddity but that’s part of why I thought it was fun. Having a high-quality pair of flip-flops does come in handy sometimes =) Send us an email if you want to chat about it further.
this step by step tutorial is inspirational, thanks.
Thanks for reading, John!
Tks so much for this post , UAL that made my day! Your big effort payed off for sure. Nice job and such a strong sandals than we find today….I’m trying to start from somewhere and make my own, since I do all kinds of craft and sew all kinds of stuff and I’m so tired of Rainbow sandals price I’m willing to try. I’ve a lot of patience like you. Could you tell me where to buy the materials? I have no clue how many Oz of the leather, is yours like 4 oz? how about the midsole? where and how do you buy? Tks so much ,
Hi Patricia. Send us an email and I can give you some suggestions on material. Thanks for reading!
Tks, what is your e.mail address please? tks so much
You can reach us at store@fineleatherworking.com. Looking forward to hearing from you!
It’s enlightening and exciting. Thanks so much.
Glad you enjoyed it, Timothy! Thanks for reading our post.
thats cool..but i have some sandals pattern that have not been produced by anyone..
I would love to see those sandals, Umezurike!
Really beautiful details on your sandals. Looks like a lot of planning and thought went into them. I’m keen to see how you find wearing them. I especially like that you even thought about how it may rub against your toes and put a piece of softer leather round the toe piece. Shows that you considered every element of the sandal and how it would wear.
My first pair of sandals used very thick leather for the sole, I could hardly cut it. I think it was called oakbark? I spent a lot of time on them but found them too hard to walk in as there was no foam in them and they killed my feet within a few minutes. Plus I felt they were a bit oversized. I am used to ready to wear sandals that are generally made to the bare minimum width of your foot. These had a lot of space around them and it almost felt like I was walking with a pair of paddles on my feet.
You have given me inspiration for my next pair. The shoe foam I was going to sell off because it wasn’t being used is now going to go back into my sewing room while I have a bit of a think about what I want to make next. 🙂
Thanks for your thoughtful reply, Betty! I really enjoyed this project and look forward to further experimentation down the road. Please send us some photos if you get around to making another pair as well!
This is pretty tempting. Thanks for sharing your process and helpful tips. Love the blog.
Thanks for your support, Luke! Let me know if you decide to dig into the project.
Hi how do I find the materials for this project? Thanks
Hi Ricea. Feel free to send us an email and we’ll see if we can help you out. Thanks!
Very night write up. Recently made my first pair and I also used veg tan for the foot bed. One issue I’ve had is the footbed has become very slippery with use as it has polished. Have you encountered this issue? Might you be able to offer suggestions? Keep up the good work
Thanks for reading, Luke! It’s fun to hear that you made your own pair. What kind of leather did you use for the footbed?
just browsed your page and blog!!!! awesome !! will be following you
Happy to have you, Angel! Keep in touch and thanks for reading!
What a great post! Thank you for this.
Hope one day I’ll wear my self-made classy flip-flops too 🙂
Thanks for taking the time to read through our post, Luttie! Keep us in the loop if you decide to give this project a shot. It’s a lot of fun.
Excelente descripción y delicado trabajo.
Muchas gracias!